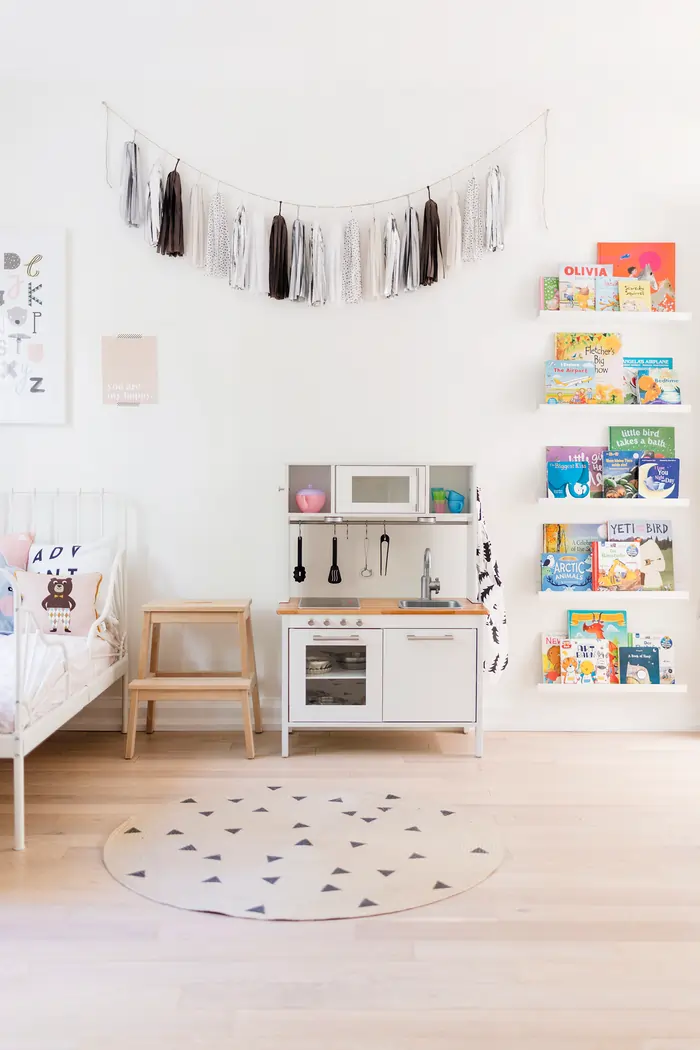
It’s no secret that I love a good IKEA hack. I love that you can take something relatively ordinary and make it unique and truly yours all without breaking the bank. One of my all-time favourite IKEA hacks (apart from our invaluable learning towers) is this DUKTIG play kitchen that we spruced up with some spray paint, contact paper + new hardware. I get asked a lot about this particular hack and I’ve never put together a true tutorial as I prefer tutorials with step-by-step photos to go with the instructions. I’m working on that (with a whole new play kitchen look!) but, in the meantime, I wanted to share the tutorial for how to make this version that we’ve had for the past three years. I’ve laid out the detailed step-by-step instructions below including links to all the supplies you need to get this Scandinavian-inspired, all-white play kitchen with a beautiful, butcher block countertop.
There are endless ways you can customize these IKEA play kitchens, and most will include some spray paint and new (or updated) hardware. We also added butcher block contact paper to the counter (I am obsessed with butcher block counters) as well as some fun battery-operated lights to give it an extra interactive element.
We also added regular drawer knobs and a couple of extra knobs to hang aprons, tea towels, etc.
Supplies
- IKEA DUKTIG play kitchen
- 2 packs of IKEA VINNA handles (you’ll need 3 of the 4 handles)
- 6 x knobs (the IKEA ones we used are no longer available, but these BAGGANÄS ones are similar)
- white spray paint (flat or satin)
- silver spray paint
- butcher block contact paper
- 3-4 x battery-operated push lights
Cost: $156 (including the play kitchen and all the supplies) or $42 if you already have the play kitchen and spray paint (as was the case for us)
Instructions
- Spray paint all the birch plywood (i.e. the non-white) pieces white, except for the countertop piece. First use primer and then follow with a flat / satin white spray paint or use a multi-purpose spray paint that that acts as both.
- Spray paint the grey pieces that you will end up using (aka the sink, faucet, stovetop, utensil rail, and utensil clips). You won’t be using the handles or the feet so no need to spray paint those. For the stovetop, you can carefully take the black stovetop plate off of the surrounding grey encasing or just tape it off for spray painting (we just taped off).
- Once everything is dry, drill holes for your knobs. We used four knobs as stove dials below the stovetop as well as one knob on each side of the kitchen to hang an apron, etc. I’ve marked where to drill in the diagram below (the “X”s on the left side) as well as which pieces are being drilled into (the red pieces on the right side).
- Ssemble your play kitchen until you get to the countertop. Stop after step 30 in the current IKEA play kitchen instruction manual. Skip the step where you add the plastic leg covers to the play kitchen’s wooden legs (step 8 in the current manual). Steps 12-14 are okay since you’re just attaching hardware to the bottom of the countertop and you won’t be covered that with contact paper.
- Attach one of the VINNA handles instead of the provided handles to the microwave (step 31 in the current manual).
- Cover the top of the countertop with butcherblock contact paper. Start on one end and use something to smooth out the bubbles as you go (like a credit card). For the corners, I just cut into it a couple of times and overlapped it. It doesn’t look perfect but it’s honestly such a small detail that no one will notice. The contact paper has held up for 3 years now, including these corners.
- Attach your 6 knobs to the holes you created before continuing with the assembly. For the four oven knobs, don’t tighten all the way so that you’re still able to rotate the knobs like you would with regular oven knobs.
- Continue assembling the play kitchen until you get to the step where you attach the handles to the bottom cabinets (step 45 in the current instruction manual). For steps 32 and 33 (the first two steps after covering your countertop with butcherblock paper), make sure to carefully poke holes into your contact paper before putting the screws through. Since your contact paper has covered the pre-made holes.
- Attach two VINNA handles instead of the provided handles to the lower cabinets (step 45 in the current manual).
- Finish the assembly – just two more steps!
- Attach the battery-operated lights to your kitchen. We added one above the stove, one above the sink, and one at the top of the glass door cabinet. If you have a fourth light, you can add one in the solid door cabinet as well.
That’s it! Easy peasy (especially if you have a hubby willing to do all the spray painting and drilling for ya lol). As always, if you have any questions about this tutorial, please leave me a comment below and I’ll make sure to answer as soon as possible!
I’m getting my little girl one of these kitchens for Christmas so I’m definitely going to do this to it! It looks fab. Thank you for sharing!
Thanks so much for sharing! I actually followed and completed your tutorial for my son. One question I had is if you have had any trouble with the silver spray paint chipping off the sink handles. We are seeing lots of scraps that show the underneath?